
🚀 Getting Started
Welcome to Indieguana! This tutorial explains basic navigation, editing your Reader Profile, and creating your Author Profile.
First Steps
After creating your account, you should familiarize yourself with the site’s navigation:
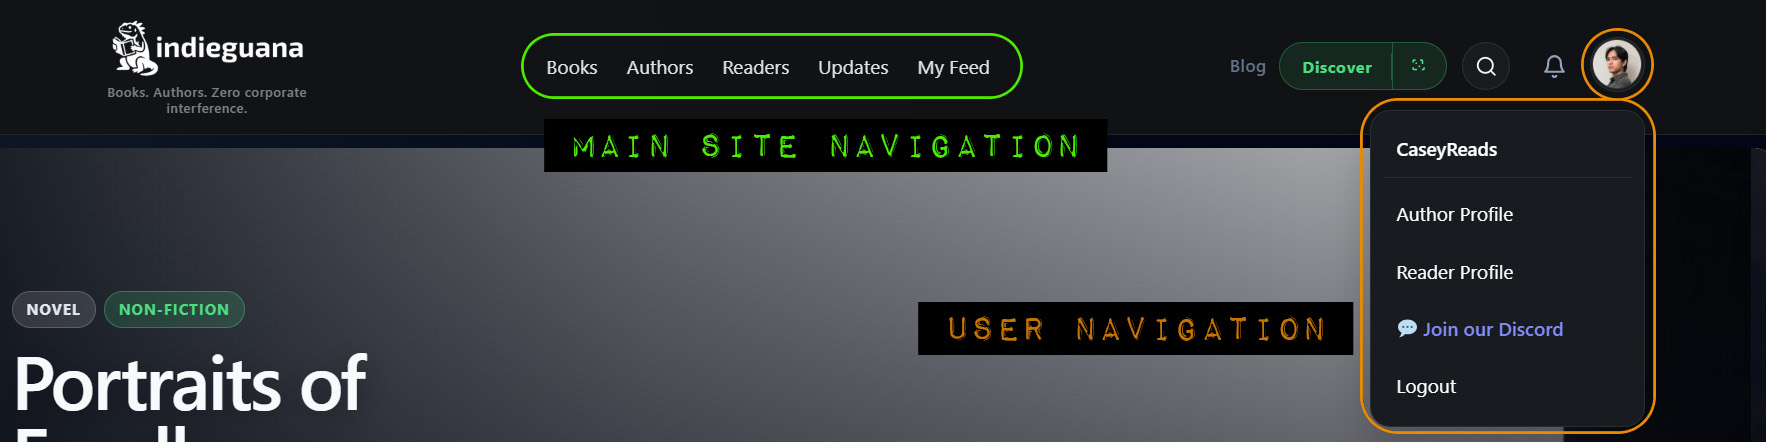
Main Site Navigation is where you’ll find the site’s primary functions:
- Books: The main directory of all books on Indieguana
- Authors: All users who have published books to the platform
- Readers: All users on the platform who have not set their Reader Profile to private
- Updates: Updates posted by all authors on the platform
- My Feed: Updates posted by authors that you follow
In the header, you’ll also see subtle links to the Tutorials and Blog, as well as the Discover (discovery queue) and Random Book buttons. Beside those are the search icon and notification bell.
The final item is your avatar image, or your initials if you haven’t added an image yet. Clicking your avatar reveals the user menu with options for editing your profiles. (You’ll see more options once you become an author on Indieguana!)
Start getting the most from the platform by completing your Reader Profile and, if you plan on adding your indie books, your Author Profile.
👍 Adding your first book automatically promotes you to Author status and adds you to the Author directory. It’s a good idea to fill out your Author Profile before publishing your first book!
Your Reader Profile
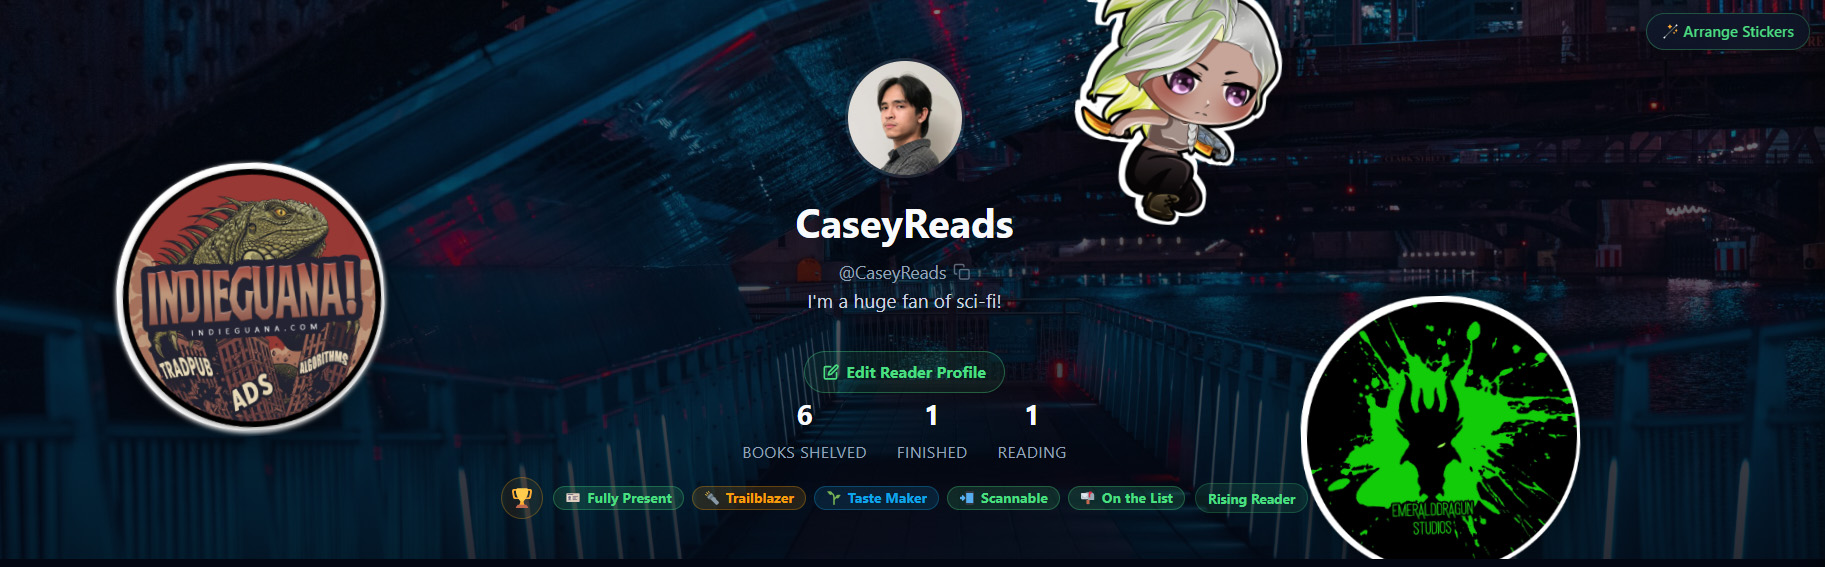
Let’s go through the elements on this example Reader Profile from top to bottom:
- Arrange Stickers button (top right): Allows you to place stickers that you’ve collected from authors on your cover image. (See the Stickers tutorial for more info.)
- Avatar Image
- Your Display Name
- Your Indieguana @username: For linking shortcodes and mentions in Author Updates
- Your short bio
- Edit Reader Profile button: Click this to edit your profile (in case you were wondering)
- Your Shelf: Displays the number of books you’ve wishlisted, finished, or are currently reading
- Your Achievements: These are earned by completing various tasks throughout Indieguana (click the 🏆 trophy icon to see what they are!)
Clicking the Edit Reader Profile button reveals this panel:
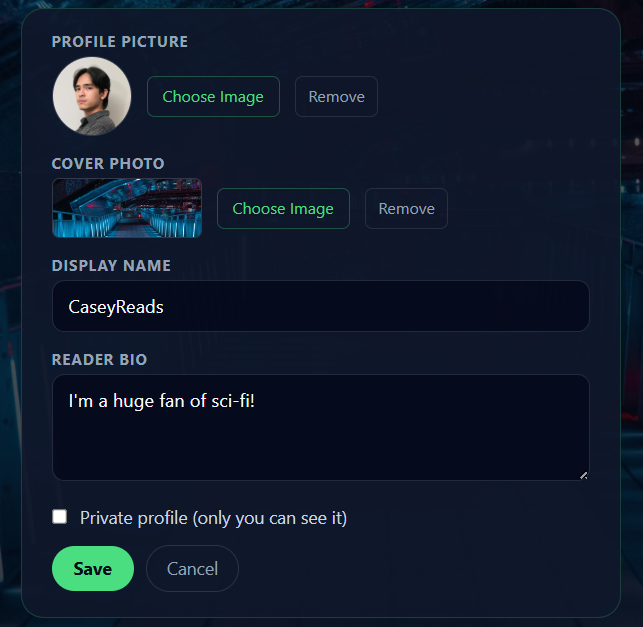
Just fill this out, and if you don’t want your profile to show up in the Reader directory, check the private profile box. Click Save when you’re done! (Avatar and cover images for Author Profile are set independently, so you can have different ones on each.)
If you want to see those Shelf numbers go up, you just need to engage with books on Indieguana. Every book page has a floating shelf widget on the right side of your screen:
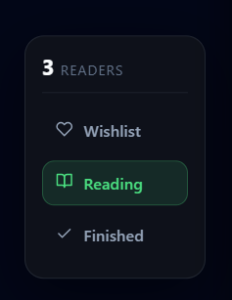
Just click whether you want to wishlist the book, you’re currently reading it, or you’ve finished it!
Your Author Profile
Your Author Profile will look very similar to your Reader Profile, because its additional elements won’t display unless you’ve completed them. Click the Edit Profile button to make that happen!
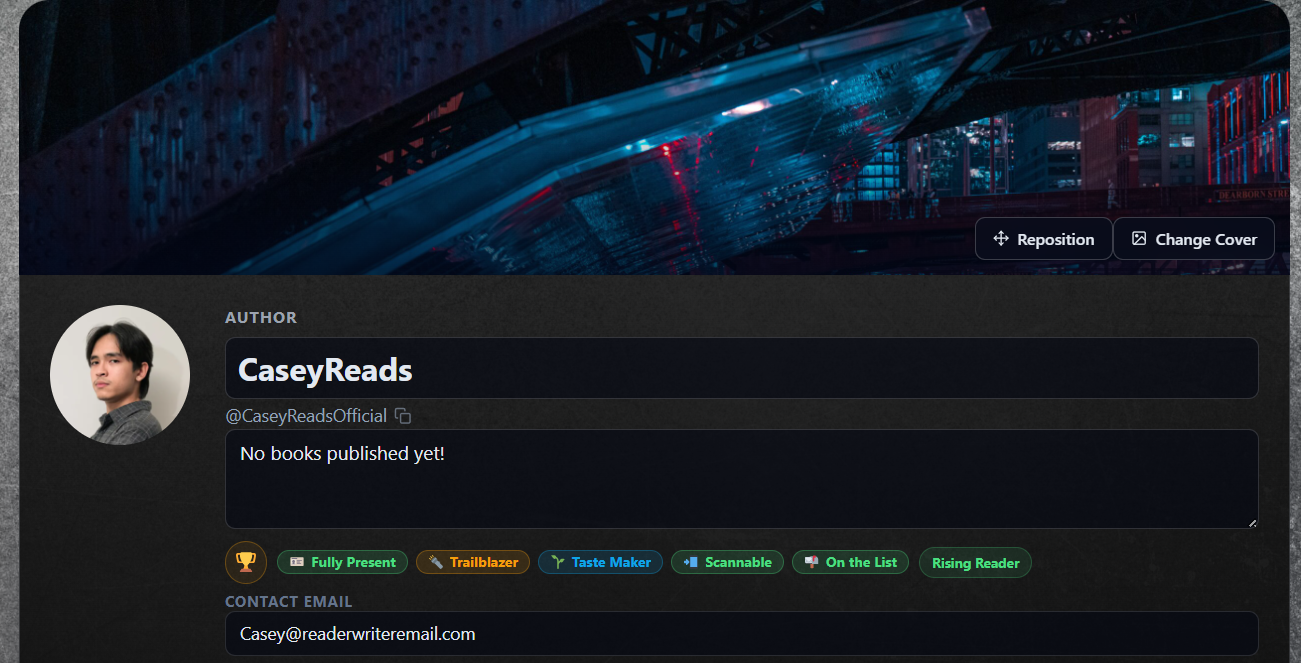
When your profile expands for editing, you’ll first see these options:
- Change (and Reposition) Cover: Add and move the cover image for the top of your profile.
- Author Display Name
- Your bio
- Achievements
- Contact Email: This is the public email that you want readers to see
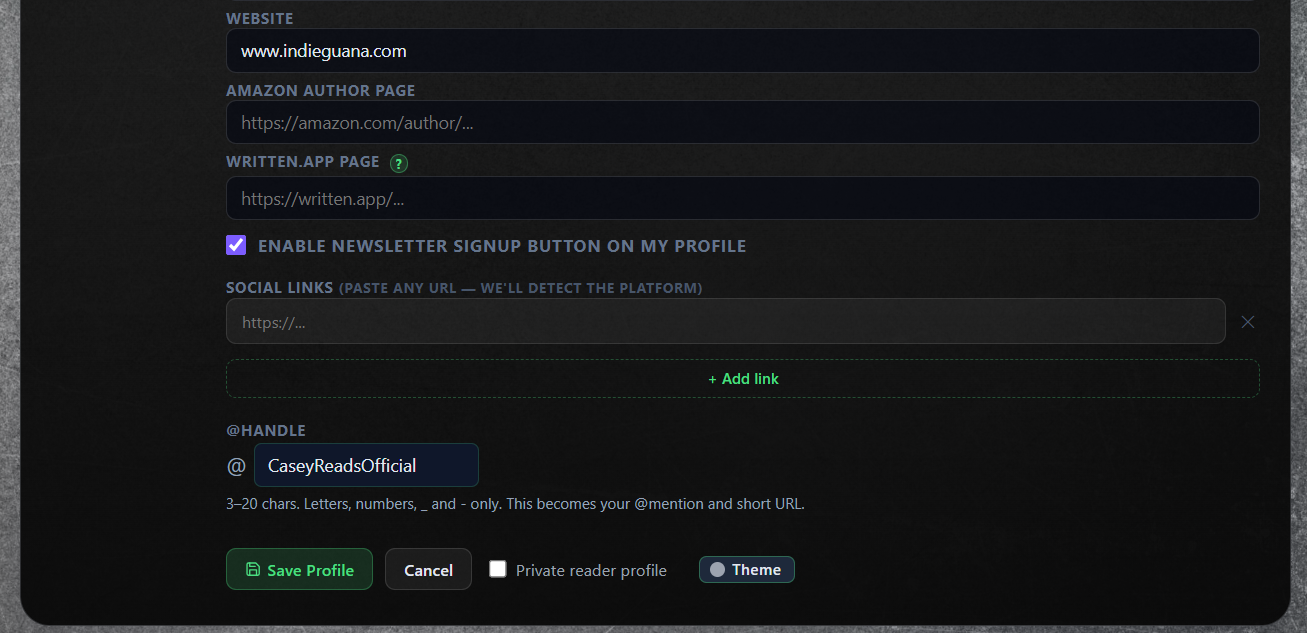
Scrolling down, you’ll see more options:
- Website: Your author website, if you have one.
- Amazon Author Page: The link to your Amazon Author page (not an individual book)
- Written App page: Link to your Written.io author page (if you’re using their platform to sell your books on the blockchain)
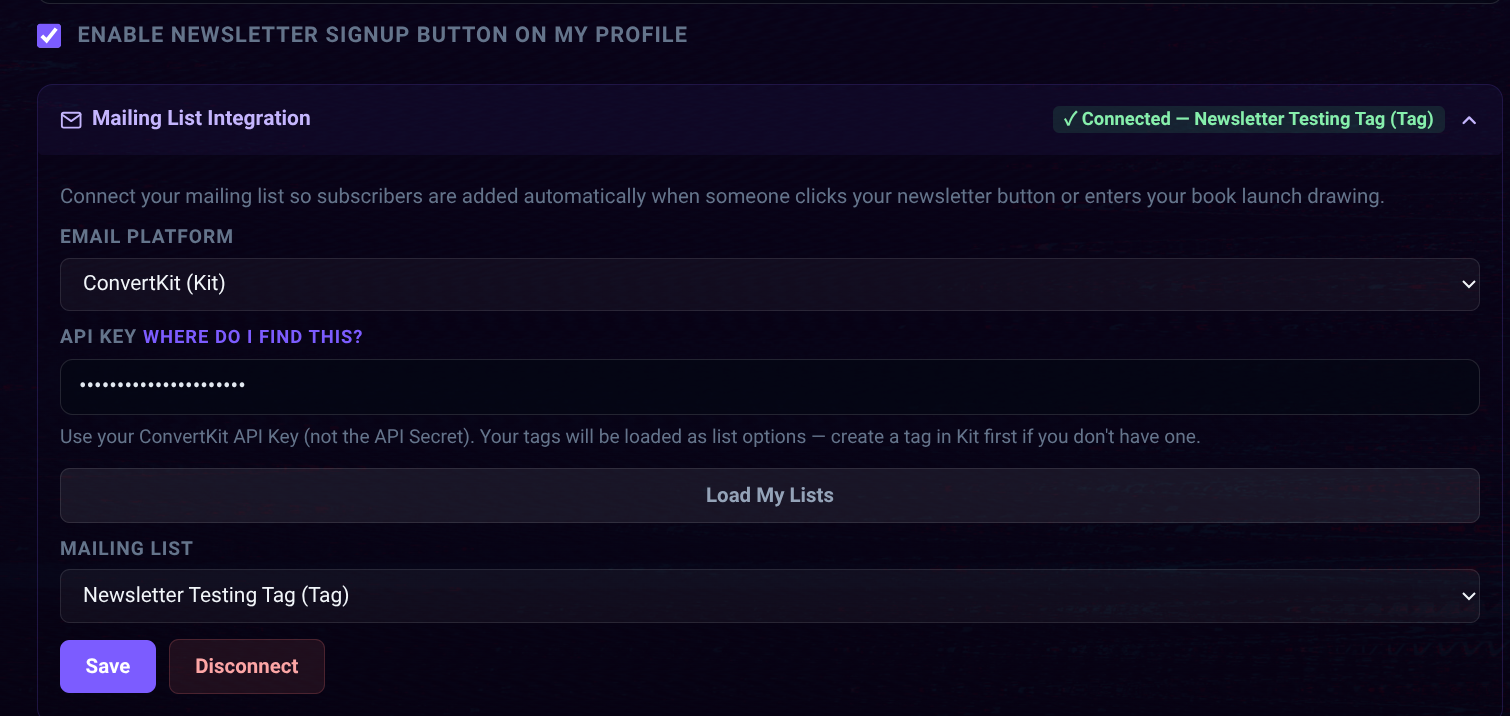
- Enable Newsletter checkbox: Checking this puts a single-click newsletter signup button on your profile.
Expand the Mailing List Integration settings to connect newsletter signups to your mailing platform. (If you don’t connect a platform, you will be informed of new signups via email so you can add them to your list manually.)
- Social Links: Add your social media platform links. The appropriate platform icon will automatically be added.
- Add Link: Click this to keep adding social media links.
- @Handle: Change your @username within Indieguana.
⚠️ Changing your @Handle will also change the slugs on your Author and Reader Profile pages, so do this with care if you’ve linked to them externally!
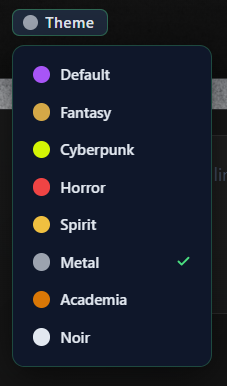
Click Save to commit your changes. You can also change the Theme (color scheme) of your profile page by clicking the Theme button and choosing from the available options! (Click Save after changing this, too.)
Author Console
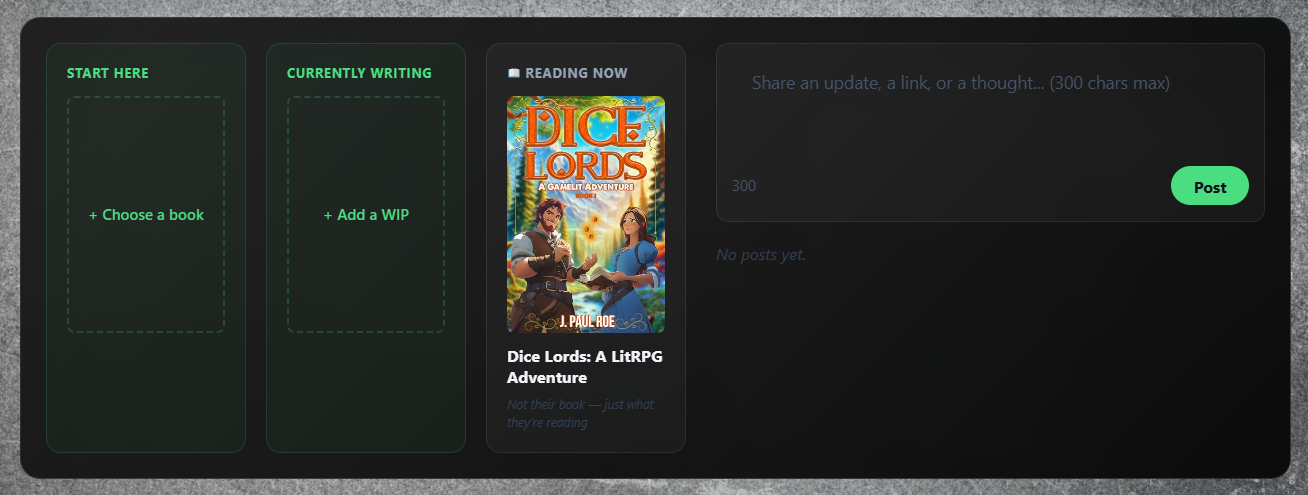
Below your profile hero section is your Author Console. There are spaces for three books in the left column:
- Start Here: Which of your books would you tell a new reader to read first? (Choose from a list of your published books when clicked.)
- Currently Writing: What book are you working on now? (Choose from a list of your books in WIP states like Draft, Editing, or ARC.)
- Reading Now: Show your love for other indie authors by shelving their books! The book you most recently shelved as Reading will be displayed here!
😁 One of the unique features of Indieguana is the ability to add books before they’re published. By adding your WIPs, you can build interest in your next book while still working on it. There are even unique features for books in ARC and Beta Reading status!
The right column of the Author Console is for your Author Updates. This is a simple area that works like a social media wall. Post updates about your books, thoughts on writing, or details about your next event! Readers will come here to see how you engage with your audience.